
How to Become a Better Player by Drawing Better Cards (A Deckbuilding Guide)
(Written by HSK MLAQTS)
How do good players always topdeck the perfect card at the perfect time? Besides heart of the cards and just being plain better than you, they probably also have the right numbers of the right cards in their decks. Believe it or not, you also can topdeck like a pro more frequently by actively considering draw probabilities when deckbuilding.
The Mulligan
Let’s start with the basics. A shadowverse deck has 40 cards, with a maximum per card limit of 3, disregarding rarity.
In the mulligan, you are shown 3 cards to keep or redraw. You cannot immediately redraw the cards you throw back, though you can draw them on your first turn (even on the play).
The probabilities for drawing a copy of any particular card by your first turn are shown below.
| Copies in Deck | 1 | 2 | 3 |
| First | 10.0% | 19.2% | 27.7% |
| Second | 12.5% | 23.7% | 33.8% |
Note that the same probabilities apply to any set of 3 or less cards.
In some decks, such as Aggro Sword, the main concern in the mulligan is drawing a 1-drop. In such cases where the desired set is larger than 3 cards, this site (more on how to use this in “Generalization and Conclusion”) is a great tool for analyzing probabilities.
The Curve
The best thing for some decks to draw is just followers to play every turn while efficiently spending all available mana. “The Curve” can refer either to such a sequence of draws, or the distribution of followers in your deck that allows you to draw it.
Of course, the later the game progresses, the more cards each player has drawn, so most decks that value playing cards on curve run many low-cost followers. Many decks have a spike in the 2-mana slot, since 2-mana cards tend to be versatile through the evolve turns and can be played on spare mana even in the late game.
12-15 is a typical amount of 2-drops for most decks, because running 12 2-drops produces a 93%/96% chance of drawing a 2-drop by turn 2, if you hard mulligan for one. The probability drops by about 5% if you don’t mulligan, so decks that need to prioritize other cards in the mulligan, such as Deus Ex Machina for Portal, Belphegor for Vengeance Blood, Daria or D-Shift for Rune, and Arthur for Sword, tend to run more 2pp cards.
Based on the same considerations, 7-9 3pp cards is a typical amount for most decks. Though the probability for drawing a 3-drop by turn 3 is lower than that of drawing a 2-drop by turn 2, the ability to play 2-drops on turn 3 without too much detriment allows for fewer 3-drops to be run, even in decks for which curving out is important, making more room for different pp-cost cards that are more valuable toward furthering a deck’s gameplan.
Since more cards are drawn as the game progresses, and low-cost cards can be played even on later turns, most decks run even fewer copies of higher-cost cards. Draw consistency for specific mana-slots matters less beyond 3pp, so card quality and usefulness toward the deck’s gameplan becomes a much greater consideration than cost, even in decks with many high-pp cost cards, such as Ramp Dragon and Ginger Rune.
One other consideration for card distributions in curve decks is the quantity of efficient evolve targets to run. Having followers that grant benefits upon evolution in the midgame is not as great a consideration as just having followers to play in the early game, since evolution orbs can be used on any follower, and it is not always correct to evolve special-evolve followers even when possible.
Thus, the quantity of special-evolve followers varies widely across decks, but most decks tend to run three copies of at least one special-evolve 2pp follower, perhaps in part because the number of high-quality fanfare or innate-effect 2pp followers is currently low.
Key Cards
Many decks in Shadowverse have a certain card or combination of cards that is critical to their gameplan. I have already given the prominent examples of Deus Ex Machina, Belphegor, Daria, D-Shift, and Arthur. There are other more subtle examples as well, such as Ramp Dragon’s ramp cards, or Aggro Sword’s one-drop.
In fact, a crucial assessor of a deck’s viability is its capacity to draw its key cards when they are needed; so how do we maximize this capacity?
Most of the time for decks with a single key card, it’s right to just run 3 copies, and to keep or even hard mulligan for the key card in any matchup that is slow enough. However, this is not always the case, and the decision also becomes more complicated when a deck has multiple key cards.
In such cases, the most important factors to consider are what turns the key cards are necessary, optimal, and viable through, and the probability of drawing the card by those turns. Some key cards, such as Dragon’s low cost ramp cards and sword’s 1-drop followers, also get progressively worse as the game goes on, so it is ideal to run as few copies as possible while still ensuring that they can be drawn when they are needed.
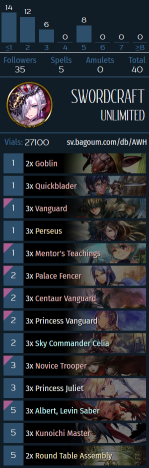
Let’s take Aggro Sword’s 1-drop followers for an example. It’s extremely important for Aggro Sword to have a follower on turn 1, but 1-drops are also playable, especially in duplicate, even on turn 2 and 3. Past the first evolution turns, however, every 1-drop follower except Quickblader becomes a very lackluster draw. So what is the right number of 1-drop followers to run in Aggro Sword?

This is a graph of the number of 1-drop followers in a deck vs. the probability of drawing at least one by turn 1 with a hard mulligan. While the numerical probabilities are different for going first vs. second, the general shape of the curve looks almost the same. Notice that the curve rises steadily at first, but rapidly tapers off around 11 1-drops.
Since we want to practically guarantee drawing a 1-drop by turn 1, but without excessively polluting our deck, we can conclude that 11 is the optimal number of 1-drops to run in Aggro Sword, since running any more does not significantly increase our chances of having a 1-drop when we need it most.
 In decks like Ginger Rune, the high amount of card draw in the deck must also be taken into consideration. In such decks built around powerful late-game win-condition cards, it is often correct to run only two copies, since typically no more than one is ever necessary per game, and a high volume of card draw diminishes the need for running a third copy.
Tech Choices
A tech card is a card which is included to help improve a particular matchup or set of matchups, but which may not be as generally useful as another option. When is it right to include tech cards, and how many is appropriate to include?
The probability calculations for tech cards are the same as those of any other card. However, the turn range a given tech card is useful through is more often determined by your opponent’s gameplan than your own. Also, tech cards should not be thought of as crucial pieces of your gameplan; the best tech cards are useful against a wide range of matchups, and remain somewhat useful even outside of the situations you included them for.
For example, I like to tech two copies of Lethal Blade in my Rotation Vengeance Blood because of the prevalence of floody board-centric decks like Artifact Portal, Midrange Sword, and Tempo and Aggro Forest. It is great as a board clear for small followers when vengeance is active, but never is significantly worse than Snarling Chains, which would be run in the deck anyway.
Another example is teching a single copy of Support Cannon in a standard Midrange Sword list, especially if the list already runs a copy of Barbarossa. The card significantly improves the mirror matchup, and is playable in any matchup slow enough that passing a single turn would not lose the game. However, it is rarely a good idea to include more copies of support cannon without significant modifications to the rest of the deck. Support Cannons beyond the first become increasingly hard to play, and typically do not contribute as much without a specialized deck. Also, a single copy enables alternative plays every turn, even if the card is dead in your hand, but multiple copies makes a deck more susceptible to bad draws in which the whole hand is useless. Therefore, the risk vs. reward of running additional copies must also be considered when deciding how many of a tech card to run.
Generalization and Conclusion
Certainly draw probabilities are important to consider while deckbuilding. But where have I been getting my numbers, and how can we calculate the probability of drawing any given card in any given situation? Well, it just so happens that the probability of randomly drawing successive cards from a deck, as we do in Shadowverse, is closely modeled (excepting the mulligan) by the cumulative hypergeometric distribution, and that there exists on the internet a handy calculator for hypergeometric distributions right within our grasp.
-The population size is the initial size of the deck at the point from which you want to start calculating a probability, which will usually just be 40 for the beginning of the game. (37 after mulligans)
-The number of successes in population is the number of cards which you are interested in drawing that are left in your deck, which at the beginning of a game is just the number that you included in deckbuilding. (Ex. you play 3 Lancer and already drew 1. There are 2 successes left in your deck.)
-The sample size is the number of cards you expect to draw, including one per card that you can mulligan. For example, on turn 4 going second, the sample size would be 8 with no extra card draw, since you can mulligan 3 cards, and will have drawn an additional 5 by turn 4. Since you can later draw back cards which you mulliganed away, this is only approximation, but it is a very close one, good enough for our deckbuilding purposes.
Now, the only relevant probabilities for deckbuilding are “Cumulative Probability: P(X > x)” and “Cumulative Probability: P(X > x).” The former is the chance that you will draw at least one copy from the set of cards you considered in “population size,” while the latter is the chance that you will draw more than one copy. As discussed above, you will often want to maximize X > x while minimizing X > x.
So go on and try it out yourself! Actively considering draw probabilities with the help of a calculator will help you to maximize your chance of drawing the cards you need just when you need them most. You may not have learned to use the Heart of the Cards, but this is probably the closest you’ll ever get in this game.
